WordPress の HTTPS 化入門
HTTPS を実現するためには、サーバーにSSL証明書をインストールする必要があります。
Let’s Encrypt はすべての人に無料の SSL 証明書を提供する非営利団体で、2020 年 2 月の時点で 10 億を超える証明書を発行しました。証明書を取得する最も簡単な方法は、EFF certbot tool を使用することです。そのサイトには、いくつかの異なる Web サーバーとオペレーティング システムの証明書をインストールおよび更新するための完全な手順が記載されています。
ローカル開発の場合、OpenSSL を使用して自己署名証明書を作成できますが、生成された証明書は他の人から信頼されないため、使用は限定されており、プライベート サーバーにのみ使用する必要があります。
HTTPS の Web サーバー レベルでは、WordPress に特に必要な追加または特別な設定はありません。 Web サーバーが適切に設定されていれば、WordPress はデフォルトで HTTPS の URL を使用できるようになります。
HTTP URL のデフォルトポートは 80番、HTTPS のデフォルトポートは 443番 です。これらのポートは、ネットワーク・ファイアウォールを介して開かないようにしてください。 Apache には mod_ssl モジュールが含まれており、これを有効にして適切に設定する必要があります。Certbot を使用している場合は、必要な VirtualHost 設定を自動的に設定し、作成できます。
WordPressにHTTPSを導入する
WordPress に HTTPS サポートを実装する場合は、WordPress アドレスとサイトアドレスの URL を httpsに設定するだけです。 WordPress をインストールするには、HTTP または HTTPS のいずれかを使用して開始できます。どちらも機能し、後で切り替えることもできます。
[設定] > [一般] に移動し、WordPress アドレス (URL) とサイト アドレス (URL) が https であることを確認します。そうでない場合は、http の後に「s」を追加し、https にして保存します。

サイトヘルス ([ツール] > [サイトヘルス]) は、Web サイトが HTTPS を使用していないことを通知します。

バージョン5.7以降、SSL証明書がすでにサーバーに設定されている場合、WordPress は自動的に HTTPSに切り替えることもできます。

WordPressのHTTPS化ベストプラクティス
すべての本番WordPressサイトでは、HTTPS を使用することをおすすめします。
- 信頼できる Web ホストを利用する。ほとんどの Web ホストでは HTTPS サービスを標準で提供している。
- Let’s Encrypt の SSL 証明書を利用する。無料で使いやすい。
- SSL 対応 CDN から静的コンテンツを配信する。
HTTP トラフィックを HTTPS サイトにリダイレクトする必要があるかもしれません。 Apache の場合は、例えば VirtualHost エントリを2つ作成することで可能です:
<VirtualHost *:80>
    ServerName mkaz.blog
    Redirect / https://mkaz.blog/
</VirtualHost>

<VirtualHost *:443>
    ServerName mkaz.blog
    DocumentRoot /home/mkaz/sites/mkaz.blog
    <Directory /home/mkaz/sites/mkaz.blog>
        Options Indexes FollowSymLinks
        AllowOverride All
        Require all granted
    </Directory>

    SSLEngine on
    SSLCertificateFile    /etc/letsencrypt/live/mkaz.blog/cert.pem
    SSLCertificateKeyFile /etc/letsencrypt/live/mkaz.blog/privkey.pem
    SSLCertificateChainFile /etc/letsencrypt/live/mkaz.blog/fullchain.pem
    IncludeOptional /etc/letsencrypt/options-ssl-apache.conf
</VirtualHost>
WordPressのHTTPS化のバッドプラクティス
- HTTPS と HTTP URL の両方からサイトを提供する場合は、HTTPS を使用してリダイレクトする。
- HTTPS ページで、HTTP から提供される CSS、JS、画像などの混合コンテンツを使用する。
参考文献と役立つリンク
- Why should I use HTTPS
- Let’s Encrypt and Certbot
- Apache Module mod_ssl – Apache モジュールの公式ドキュメント
- Encrypting the Web (EFF.org)
- HTTPS as a ranking signal (Google)
- Best Practices Securing Your Site (Google)
WordPress.tv の埋め込みブロックを使用して、WordPress.tv の動画を投稿またはページに追加できます。埋め込まれた動画にはパワフルな再生コントロールが含まれているため、再生中も視聴者をページにとどまらせることができます。動画を埋め込むのに WordPress.tv アカウントは必要ありませんが、公開されている必要があります。
埋め込まれた WordPress.tv の動画:
WordPress.tv から動画を埋め込む手順:
- 動画のパーマリンクを探す
Web プレイヤーで動画を選んで、”SHARE” ボタンをクリックします。

- 共有のセクションで、パーマリンクをクリックすると自動でコピーされます。または、リンクを選択してコピーすることもできます。

他の方法でもリンクを追加して埋め込めなかったら、再試行するか、URL をリンクに変換することができます。
- WordPress.tv の埋め込みブロックをページ/投稿に追加します

ブロックを追加する詳細な手順はこちらから。
- リンクをテキストボックスに貼り付けて、「埋め込み」ボタンをクリックします。

正しく埋め込めるリンクだった場合には、エディターにプレビューが表示されます。

埋め込めない URL を使用すると、ブロックに「If you use an URL that can’t be embedded, the block shows the message “Sorry, this content could not be embedded. (申し訳ありませんがこのコンテンツを埋め込むことはできませんでした。)」と表示されます。

別のURLで再試行するか、リンクに変換するか、2つの選択肢の中から選べます。
- 「プレビュー」をクリックして、フロントエンドでどのように表示されるかを確認します。

ブロックツールバー
WordPress.tv 埋め込み用のブロックツールバーには「動画」と「ドラッグ & ドロップ」ハンドルの他に、4つのボタンが表示されます。
- Transform To (変換先)
- Alignment (配置)
- Edit URL (URL を編集)
- More Options (ほかのオプション)

変換先:

WordPress.tv 埋め込みブロックをグループに変換することができます。これにより、WordPress.tv の埋め込みブロックの背景色を変更することができます。


配置:

- 左揃え – ブロックを左揃えにします。
- 中央揃え – ブロックの位置合わせを中央に配置します。
- 右揃え – 右揃えブロックを作成します。
- 幅が広い – ブロックの幅をコンテンツサイズを超えて増やします。
- 全幅 – ブロックを拡張して画面の全幅をカバーします。
「ワイド幅」と「フル幅」の配置設定は、WordPressテーマで有効である必要があります。
URLを編集する
編集 URL を介して、埋め込みブロック内の WordPress.tv に埋め込む URL を変更することができます。既存の URL を上書きして、「埋め込み」ボタンをクリックしてください。

ブロックの設定
高度な設定

高度な設定のタブでは、ブロックに CSS クラスを追加して、カスタム CSS を記述して、ブロックを自由にスタイリングすることができます。
変更履歴
- 2020 年 9 月 2 日に更新
- WordPress 5.5 のスクリーンショット
- WordPress.tv ビデオの埋め込み
- 2020 年 8 月 19 日に更新
- 新しいスクリーンショットとして「その他オプション」を置き換え
- その他のオプションの下に「移動先」と「コピー」のセクションを追加
- 2020 年 7 月 24 日に作成
With the WordPress Embed block, you can embed WordPress posts into your posts and pages. You don’t need a WordPress account to be able to use it. You can only embed public posts, though.
An Example:

Steps to embed a WordPress Post
- You need to find the URL of the Post.
Find the URL of the WordPress post you want to embed in your page. Copy the link of that post from the search bar.

- Go to your post or page
- Add the WordPress block

Detailed instructions on adding blocks can be found here.
- Paste the link into the text box and click the “Embed” button

If it’s a link that can be successfully embedded you will see a preview in your editor.

If you’re using a link that cannot be embedded, the block shows a message, “Sorry, this content could not be embedded.”
You will have two choices: Try again with a different URL or convert it to a link.

6. Click on “Preview” to see how it will look on the front-end.

Block Toolbar
Besides the Mover and Drag & Drop Handle, the Block Toolbar for the WordPress embed shows four buttons:

- Transform to
- Change alignment
- Edit URL, and
- More Options.
Transform to:

You can transform a WordPress embed to a Group. This would give you the ability to change the background color around the WordPress embed.


Change Alignment – use reusable Block

- Align left – Make the WordPress post left aligned
- Align center – Make the WordPress post alignment centered
- Align right – Make the WordPress post align right
Edit URL
Via the edit URL, you can change the WordPress Embed URL in the embed block. Overwrite the existing URL and click on the “Embed” Button.

More Options:

Hide Block Settings
The Hide Block Settings option hides (or shows) the Block Setting panel in the editor’s sidebar.
Copy
Copy can be used to copy a selected block and then you can paste it wherever you want in the editor.
Duplicate
Duplicate can be used to duplicate selected block.
Insert Before
Insert a new block before the selected block(s).
Insert After
Insert a new block after the selected block(s).
Move To
If you select Move To, you will get a blue line inside your content, you can then use the arrows to move that line up and down to where you want the selected content to be moved into, hitting return on your keyboard at that point moves the block to that position.
Edit as HTML

The Edit as HTML option allows you to modify the HTML code of the embed block.
Add to Reusable blocks
Using the Add to Reusable blocks option lets you add the selected block to a list of reusable blocks, so you can use them on other posts or pages as well.
Group
Select the Group option if you want to create a group of blocks and treat them as a unit. You can for instance add a common background color or other blocks to the group.
Remove Block
With the Remove Block option, you can delete the selected block from your content.
Block Settings
Media Settings


Via the Media Settings you can control the behavior of your post embed when viewed from a smaller device, like on a phone screen.
The Toggle switch turns on or off the resize functionality for smaller devices. The default setting is “on” or blue.
“Off:” This embed may not preserve its aspect ratio when the browser is resized. In the off position the toggle switch is gray.
“On:” This embed will preserve its aspect ratio when the browser is resized. The toggle switch turns blue in the “On” position.
Advanced
The advanced tab lets you add a CSS class to your block, allowing you to write custom CSS and style the block as you see fit.

Changelog
- Updated 2020-08-18
- Replaced “More Options” – new screenshot
- Added “Move To” and “Copy” section under More Options
- Created 2020-05-25
フォーラムに投稿したり、コメントするには、WordPress.org (今見ているこのサイト)にアカウントを作成し、ログインする必要があります。
WordPress.org アカウントの作成
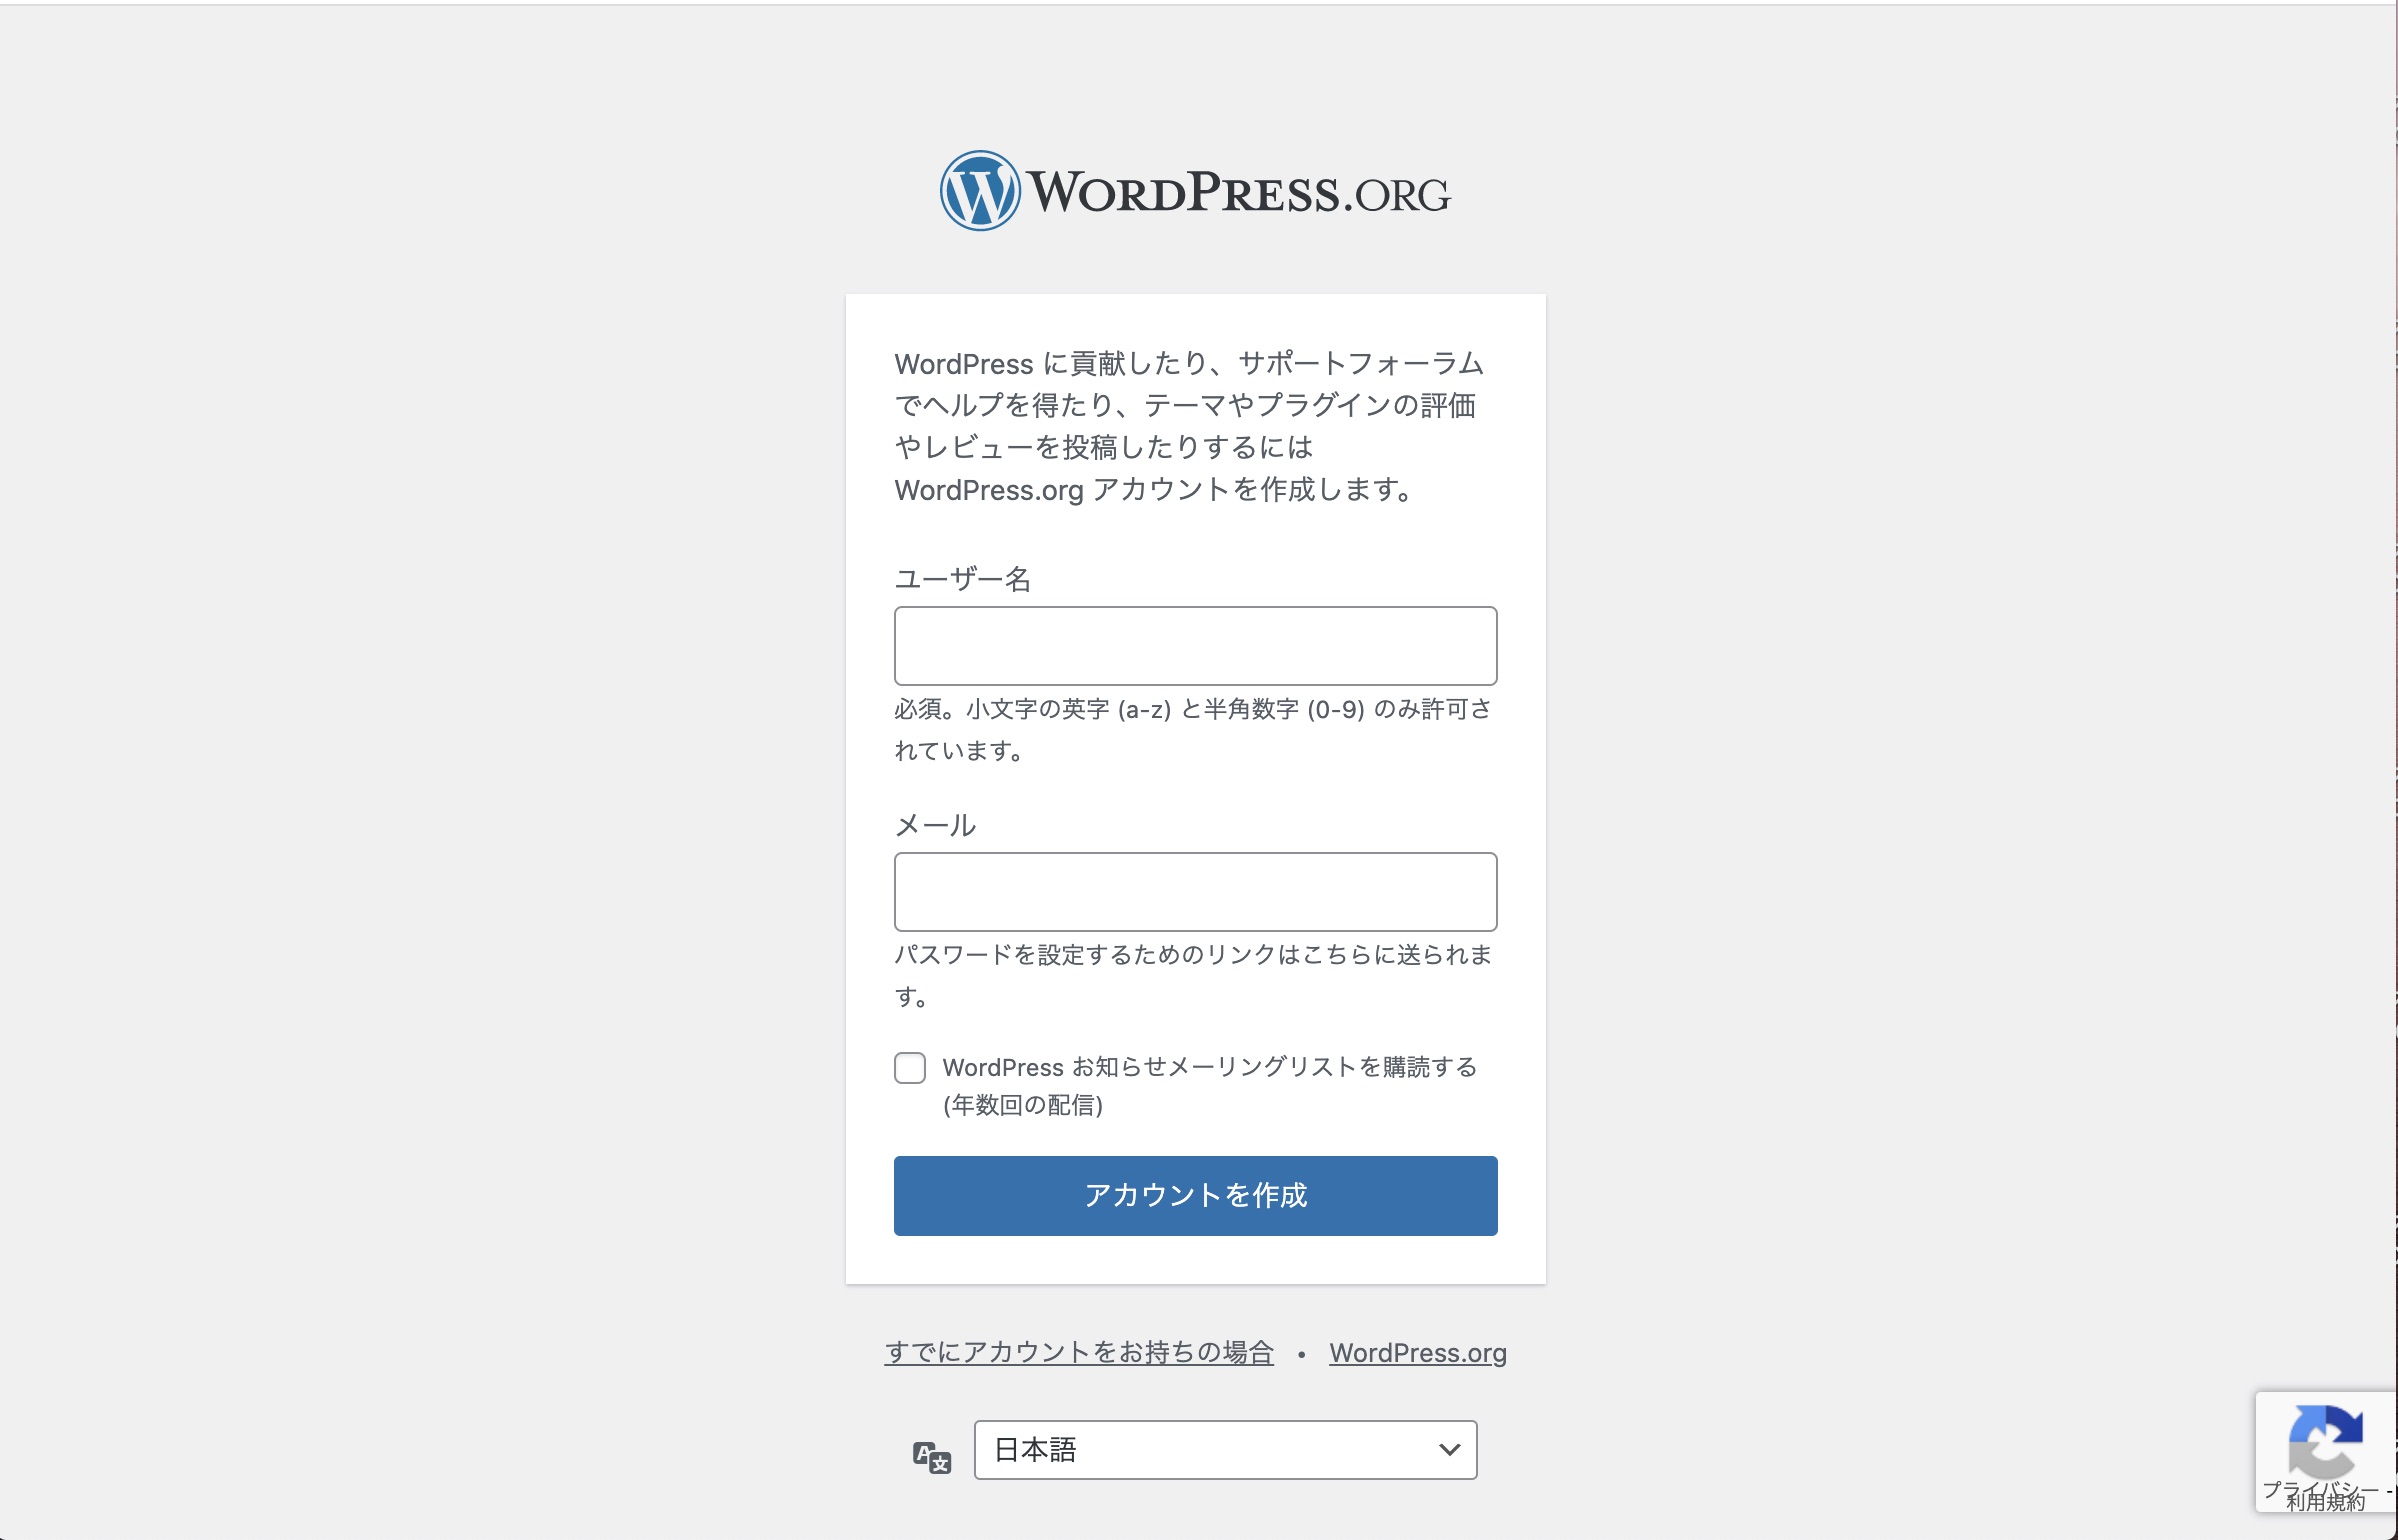
- ユーザー名、メールアドレスを入力し、「アカウントを作成」をクリックする。
- 送られてくるメールのリンクに従ってパスワードを設定する。
WordPress.org へのログイン

- ユーザー名、パスワードを入力し、「ログイン」をクリックする。
このページの最新版は https://ja.wordpress.org/support/welcome/ にあります。
このページは https://ja.wordpress.org/team/handbook/translation/wordpress-translation-steps/ へ移動しました。
このページは https://ja.wordpress.org/team/handbook/translation/ へ移動しました。
WordPress のサポートに協力する前に、フォーラムのガイドラインとよくある質問 (未訳・Google 翻訳リンクはこちら) を必ずお読みください。サポートを依頼する場合も、サポートする場合も、関係者全員がフレンドリーで歓迎的な雰囲気を維持するのに役立ちます。
サポートを求める
質問を投稿する前に、WordPress.com 上のサイトではなく、インストール型 WordPress.org サイトの質問であることを確認してください。 (よく分からない場合は WordPress.com と WordPress.org の違いをお読みください)。
適切なフォーラムに質問を投稿してください。ただし、どのフォーラムが適切か分からない場合も問題ありません。投稿場所に関わらずサポートは提供されますし、モデレーターにより適したフォーラムに投稿を移動してもらうことも出来ます。質問が他のトピックとよく似ていたとしても気軽に新しいトピックを作成してください。サイトはそれぞれ異なるので、全く同じ問題ということはほとんどありません。
投稿時に「返信をメールで投稿者に知らせる」チェックボックスをオンにすると、誰かがあなたの質問に回答したり、さらに詳細な情報を求めている時に通知を受け取ることが出来ます。
もし国際版のフォーラムに投稿することが適切だと思わない場合は、各国語版フォーラム一覧から選んで、ご自分の言語でサポートを受けることも出来ます。
誰かが教えてくれた解決方法を試してみたら、ぜひトピックに戻って、何が上手くいって何が上手くいかなかったのかを伝えてください。今後似たような問題の解決策を探す人の助けになります。
サポートを提供する
興味のある分野の中からどのようなトピックが未回答なのかを見てみましょう。どこから始めてよいか分からない場合は、未解決のトピック一覧を見るのがおすすめです。
関心はあるけれど答えを知らない場合は、尋ねているユーザーと一緒に学べる絶好の機会といえます。どうやってその問題を調べたのかを共有し、お互いに学び合って成長しましょう !
参加したトピックに新しい投稿があった際に通知が来るよう「返信をメールで投稿者に知らせる」チェックボックスをオンにしましょう。サポートを求めている人がフィードバックを提供しているかどうか (問題が解決したか、何か他のことが起こったか、新しい情報などがあるか) を知ることができます。
セキュリティ脆弱性の報告
プラグインやテーマ、時には WordPress にさえも脆弱性が見つかる場合があります。WordPress.org では多くのプラグインをホスティングしており、しばしばそのような報告を受け取ります。
セキュリティの脆弱性を見つけたと思った場合は、責任ある脆弱性報告のページを読んでください。一般に公開されたフォーラムには投稿しないでください。
注: このページは、ブロックエディターを使用しているWordPressを対象としています。古いバージョンの WordPress をお使いの方や、Classic Editor プラグインをお使いの方は、こちらのページを参照してください。
インストール後のステップ
WordPress の5分間インストールや、サーバーからのワンクリックインストールが終わったら、次はどうしたらいいでしょう。
WordPress サイトを一歩ずつ見て回って、さまざまな機能の使い方と、新しいサイトをあなただけのものにする方法を見てみましょう。チュートリアルの冒頭部分は、チュートリアルに含まれていない限り、プログラム内部のことには手を付けないでください。以下のステップに従ったあとで、あなたもすぐに変更できるようになります。
ログイン
まずはサイトの管理画面エリアまたはバックエンドにログインすることから始めましょう。

サイトのログインページを開くには、ドメイン名の後に wp-admin と追加します (例: http://example.com/wp-admin)。テーマによってはフロントエンドにログインフォームやリンクがある場合もあります。
インストールの際に作成したユーザー名とパスワードを使ってログインします。
トップからスタート
ログインすると、ダッシュボードと呼ばれるメインの管理画面が表示されます。ここがサイト管理のスタート地点です。

画面上部にツールバーと呼ばれるエリアがあります。サイト名をクリックしてみましょう。リンクになっていて、新しい WordPress サイトの表示画面に移動します。
気に入りましたか ? それとも、まだ慣れないでしょうか。どちらにしろ、ここがこれからたくさんの時間を過ごす作業の場所となります。
WordPress サイトをテスト運転してみよう
サイトを変更したり、動作の仕組みを理解する前に、ゆっくり時間をかけてサイトを見てみましょう。Twenty Twenty-One テーマがどのようにレイアウトされ、どのように動作するかを確認することが重要です。これは、特別な機能を追加する前のテスト運転と考えてください。

サイトの外観は、WordPress テーマによって定義されています。テーマは、サイトの外観やコンテンツの枠をスタイリングするものです。WordPress テーマ “Twenty-Twenty-One” では、一番上に「ヘッダー」があり、サイトのタイトルやキャッチコピーが表示されます。その下には、メニューがもしあればそれが表示されます。ページの中央部には、コンテンツエリアがあります。
ページをスクロールすると、検索ボックスや最近の投稿、最近のコメントなどが表示されます。これらは、 ウィジェットと呼ばれています。
ページの最後にあるバーに注目してください。これは「フッター」と呼ばれています。”Proudly powered by WordPress” と書いてあるはずです。
色々と見て回ろう
今のところ、サイトには1つの投稿しかありません。その投稿は、ホームページやフロントページのようにレイアウトされたページの中に存在しています。投稿のタイトルをクリックすると、その投稿の特定のページに移動します。
サイトの最初のページ (トップページ) には、最新の投稿が掲載されています。各投稿のタイトルは、その投稿の実際のページにリンクします。テーマデザイナーの中には、個別投稿ページをホームページとは異なるデザインにする人もいます。
個別投稿ページでは、レイアウトに注目して、デザイン要素の何が違うのか見てみましょう。ヘッダーに何か違いはあるでしょうか。小さかったり、大きかったり、色が違ったり。サイドバーはありますか ?
これらの変更はすべて、テンプレートファイルと呼ばれるファイルから作成されます。テンプレートファイルの仕組みについては、テーマ開発ハンドブックで詳しく説明しています。しかし今のところは、WordPress の残りの部分がどのように機能するかについて説明していきます。
WordPress 管理画面をテスト運転してみよう
Web サイトの見た目とそれぞれのレイアウトセクションの名前が分かったところで、WordPress の管理画面を使ってみましょう。これは新しい Web サイトのバックエンドに慣れることになります。実際にログイン後にはじめて表示される画面は「ダッシュボード」と呼ばれ、WordPress サイトでの活動や操作に関する情報・データが集められています。

ダッシュボードにはサイトで実行された最新のアクティビティの一覧が表示されます。また、WordPress リソースからの興味深く新しい情報を最新の状態に保つのにも役立ちます。
画面の左側には、使える管理機能を詳しく示したメインナビゲーションメニューがあります。リストの上にカーソルを移動すると「サブ」メニューが出現しますので、そこにカーソルを移動して詳細な項目を選択します。ナビゲーションの「親」メニュー項目を選択すると、そのセクション内に詳細な項目が表示されます。
それぞれのメニューの項目は次の通りです:
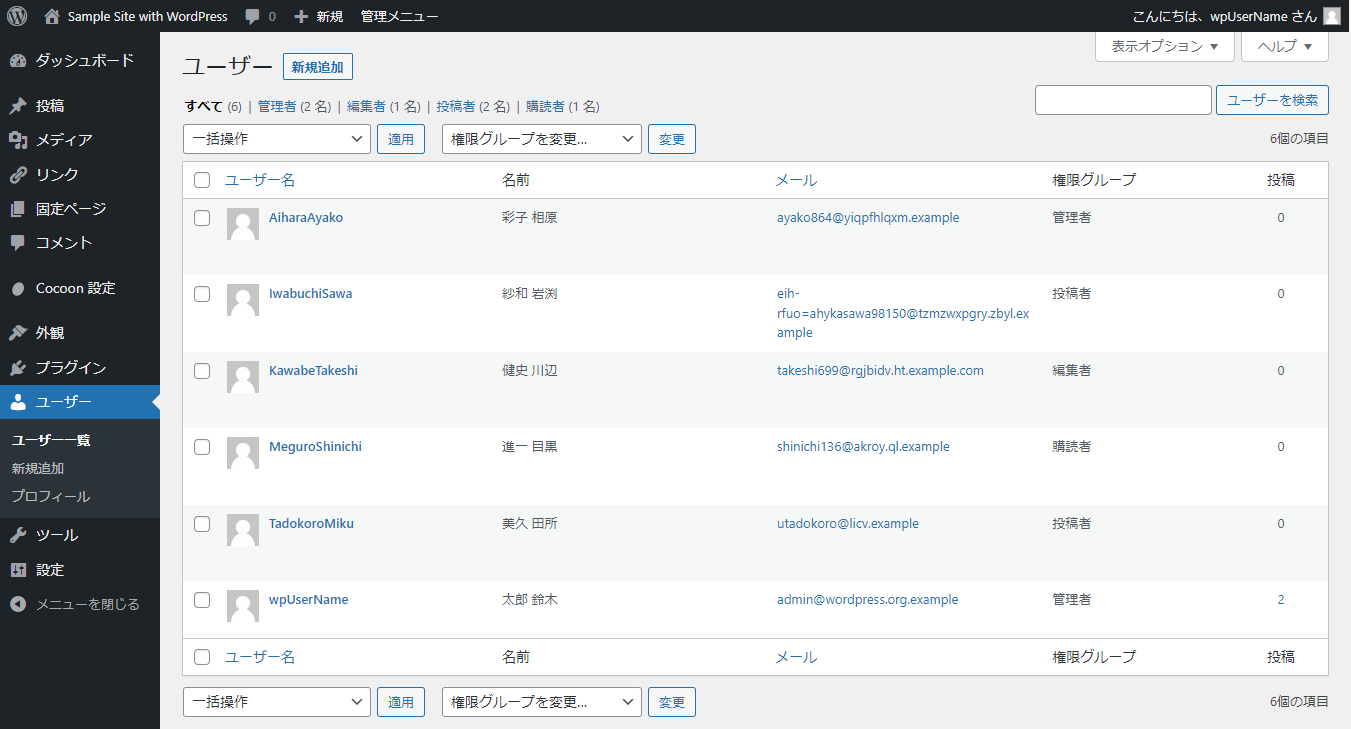
ユーザー画面から始めてみよう
「ユーザー」のタブ(メニュー)を選択してみてください。すべてのユーザーのリストが表示される「ユーザー一覧(ユーザー)」という画面に変わります。
ここで、ナビゲーションメニューの「プロフィール」をクリックします。サイトの作成者・管理者であるあなたの情報を入力できます。入力し終えたら、「プロフィールの更新」をクリックします。

それでは、WordPress 管理者の他のパワフルな機能をご紹介しましょう。
外観の変更

外観 > テーマ画面ではさまざまなテーマでサイトの外観を変更できます。テーマは、サイトの見た目を一変させる表現スタイルです。開発者やユーザーによって数百種類のテーマがデザインされていますのでご自由にお選びいただけます。「外観」画面には現在インストールされているテーマの一覧が表示されており、「WordPress Twenty Twenty-One」も含まれています。テーマをすぐに変更するには、リストアップされているテーマの下にある「有効化」をクリックするだけです。上部にあるツールバーのサイト名をクリックすると変わっていることを確認できます。わぁ!もう一回見てみたいっ!こんなにも簡単なんですね。「外観 > テーマ」に戻って「WordPress Twenty Twenty-One」テーマの「有効化」ボタンをクリックすると、もとのデザインに戻ります。実際の見え方を確認するには、、そうでしたね、ツールバーのサイト名をクリックしてください。
投稿の作成
管理画面に戻って「投稿」画面を見てみましょう。「投稿」というメニュー項目の下にあるタブを使って投稿を書いたり管理したりできます。まずは「新規追加」から最初のテスト投稿をしてみましょう。
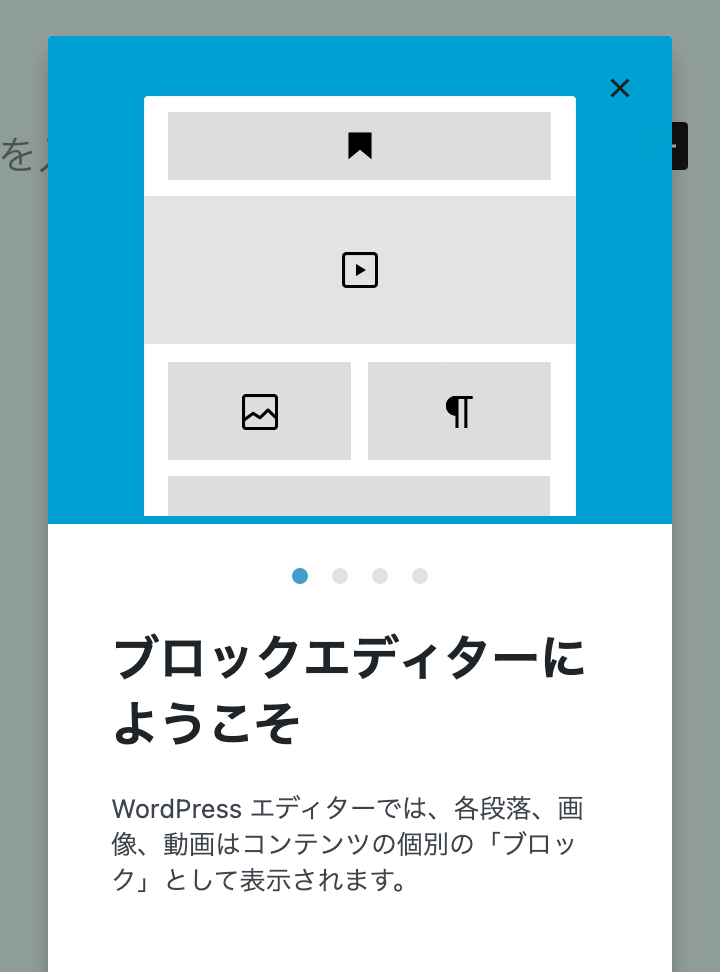
はじめてブロックエディタを使うときには簡単なチュートリアルが表示されます。
入力欄にタイトルを追加して、「ブロックを選択するには『/』を入力」の部分に文章を書きます。テストなので何を書いてもかまいません。

書き終わったら、ページ右上にある「公開」ボタンをクリックします。確認のための画面が表示されるので、もう一度「公開」をクリックすると確定されます。

これで投稿の書き方が分かったと思います。画面上部のツールバーのサイト名をクリックすると、自分のサイト上で投稿を見ることもできます。
コメント
Part of the fun of WordPress is the ability to have viewers leave comments on your site. It creates a dynamic interchange between you and the viewer. Do you want comments on your posts? Comments on posts come in a variety of forms, from pats on the back (Good job! Like the post!) to extensive conversations and commentary about the posts. Or maybe you are seeking comments that add to the information you’ve posted. Responding to comments and moderating them can also take up a lot of time. If they are critical to your site, then include them and consider how you want them presented. You can make a few comments yourself on the post you created. Take a look at how they are laid out and consider how you might want them to look to fit into the design and layout of your site. When you have reached your decision about how you want to handle comments, take time to read through the article on comments and WordPress discussion options to help you set those features.
スパムの防止
There is more to think about when it comes to having comments on your site. Unfortunately, we live in a world where spam is a fact of life. It is recommended that you begin battling the comment spammers with the helpful article, Introduction to Dealing with Comment Spam.
カテゴリーの作成
Posts are usually stored in Categories and/or Tags so you can keep related topics together. Right now you only have one category, but you will soon want more. In the Posts > Categories tab, in the Add New Category area, fill in the information about your category. Continue to add your parent categories, going down the list. Hold off on entering subcategories until all the main categories are entered.
NOTE: You can add any new category at any time, but make a note of the fact that categories can be sorted in WordPress in two ways: by name (alphabetically) or by ID number. As you enter the categories, they are assigned an ID number. It is difficult to change this, so if you don’t want your categories sorted alphabetically, enter them in the order you want to see them presented on the screen.
サイトの設定
Before you get to the graphic look of your site, let’s do a little more administration to your site to set it up. You may want to install plugins to supercharge your website, and don’t forget to activate the Akismet WordPress Plugin that is available with all WordPress sites to help protect it from comment spam. When you have the parent categories entered, enter your subcategories. In the pull-down menu for Parent Category, you can select the parent to the subcategory you are adding. When you view your categories in the Manage > Categories Screen, you will see the categories listed like this:
- Computer Tips
- Windows
- Linux
- Mac
- Internet News
- Web Page Design
- Web Standards
- WordPress
- Plugins
- Themes
投稿にカテゴリーを割り当てる
Let’s put some of your test posts into categories so you can see how this works. From the Posts > Category Screen, click on the tab for All Posts. You should see the test posts you entered here. When you hover your mouse over each post title, under the title, you should see the Edit | Quick Edit | Trash | View links. Click on Edit to edit one of the posts. On the right side of the Edit Post screen, you will now see your Categories. Choose one of them by clicking on the box next to it. Then in the Publish module above, click the Update button. Repeat this for your other test posts, putting each one in a different category. Now view your page by clicking on your site name in the toolbar at the top of your Administration Screen. Do you see the categories listed in the sidebar now? Great. If you are missing a category, that usually means that there are no posts in it. This is the default function of WordPress, so not to worry. When you add a post to the “missing” category, it will appear on your web pages. Click on one of the categories and you will be taken to a page for just that category. You should see the posts that went into that category. This is a generated Category page. Now, click on the Archives for the month showing. Now you are visiting a generated page of your posts listed in chronological order for this month – well, specifically for today only. Two methods of finding the same information.
次のステップ
You’ve now done all the basics for your new WordPress website. You know how to write a post, create a category, and how to view your site’s information by category and archive. You can start the customization process, and when you are done, don’t forget to delete your test posts! Then start writing some wonderful information to share with your new-found public!
WordPress テーマの利用
There are hundreds of WordPress Themes to choose from. All do basically the same thing but graphically present the information in a myriad of ways. Choose a few that look interesting to you, and meet your audience’s needs and your desires, and then test drive them following the test drive instructions above. Click through the whole site, the categories and archives as well as the individual posts to see how the Theme handles each one. The look may be nice on the front page, but if it handles things in a way you don’t like on the single post, then you will have to dig into the code and make changes. Not ready for that, try another theme.
独自テーマの作成
If you are familiar with CSS, HTML, and even PHP and MySQL, consider either customizing the Theme to your own needs or creating your own Theme.
WordPress プラグインの利用

WordPress Plugins are also known as add-ons or extensions. They are software scripts that add functions and events to your website. They cover the gamut from up-to-date weather reports to a simple organization of your posts and categories. Plugins are designed by volunteer contributors and enthusiasts who like challenges and problem-solving. They are usually fairly simple to install through the WordPress Admin Plugin Screen, just follow the instructions provided by the plugin author. Remember, these are free and non-essential. If you have any problems with plugins, contact the plugin author’s website or plugin source first, then search the Internet for help with that specific plugin, and if you haven’t found a solution, then visit the WordPress forums for more help.
独自プラグインの作成
If you are familiar with PHP, HTML, and maybe even MySQL, you may be able to customize WordPress to work the way you want by creating your own Plugin.
基本のその先
The exciting thing about WordPress is that there are few limits. Thousands of people are using WordPress for blogging and for running their websites. For example, look at some of the entries under the WordPress.org Theme Showcase. All have a different look and different functions on their sites. What you do from here is up to you, but here are a few places to take that first step beyond the basics:
- WordPress Features
- Working with WordPress
- WordPress Semantics
- Using Pages
- Troubleshooting
- Using Permalinks
- Getting More Help
- Using the Support Forums
- WordPress Code Reference
- Learn WordPress
WordPress エディターはまったく新しいパブリッシング体験です。WordPress エディターを使用すると、メディアを駆使したページや投稿を作成し、簡単にレイアウトを管理できます。投稿やページのすべての要素にそれぞれのブロックができたため、テキスト、引用、画像の配置や構成を気にすることなく、作成に集中できます。
各ブロックを移動、編集、カスタマイズすると、エディターには実際のサイトで見えるようにビジュアル要素が表示されるため、今まで「公開」ボタンをクリックする前にコンテンツのプレビューと再確認に費やしていた時間を節約できます。
WordPress Version 5.5 の新機能
- ブロックディレクトリ
- プレビュー機能の使用
- ドキュメント上でのブロックの移動方法 (キーボード + ドラッグアンドドロップ)
- ブロックパターン
- インライン画像編集
注意: ドキュメント作業は進行中です。ページが完成したらこちらも更新します。
エディターワークスペース
WordPress 5.4 から、投稿や固定ページを新規追加すると、ブロックエディターはフルスクリーンモードで編集画面を開きます。

管理画面に戻るには ?

管理画面にアクセスするには、左上の WordPress のロゴをクリックしてください。投稿一覧、または固定ページ一覧に戻ります。
フルスクリーンモードを停止するには ?

フルスクリーンモードを停止するには、右上の三点リーダーをクリックし、「フルスクリーンモード」のチェックを外してください。
ここでの選択はブラウザーのローカルストレージに保存されます。ブラウザーを変えると選択は失われ、再度設定する必要があります。別のコンピュータを使用する場合も同様です。
Safari ブラウザーのユーザーはデフォルトの設定がリセットされる場合があります。これは Safari ブラウザーがローカルストレージの内容をときどき削除するようプログラミングされているためです。
WordPress コア開発者はユーザー設定を保存する最善の方法を議論しており、将来のリリースではこのブラウザー間の違いも解消する予定です。
なお Blockeditor Fullscreen Mode Control プラグインを使用するとデフォルトの動きを変更したり、デバイスを越えてフルスクリーンオプション設定を永続的に保存できます。
機能
ブロック
WordPress エディターはブロックを使用してコンテンツの作成方法を変換します。 単一のドキュメントは、体系的で容易に調整を行える構造を持つ個別要素の集合に変換されます。
新しいエディターには、ページや投稿の作成を簡単にする新機能があります。ブロックを使用すると、ショートコード、カスタム HTML コード、埋め込みが必要な複数のメディア要素やビジュアル要素をすばやく追加してカスタマイズできます。
ブロックの詳細
それぞれのブロックは、ブロックツールバー、ブロック設定サイドバー、ブロックコンテンツから構成されます。ブロックの目的によりブロックツールバーのボタンやブロック設定サイドバーの設定項目は変わります。すべてのコアブロックは3つのセクションに分けられます。1) ブロックがどのように動作するかの説明、2) ブロックツールバーの項目、3) ブロック設定サイドバーで何を変更できるか。

ブロックを追加する
豊富なブロックタイプから選択できます。それらはカテゴリー別や最近使用した順に表示されます。 各ブロックは他のブロックとは関係なく編集または移動できます。また、ブロックには、レイアウトや機能をさらに強化する独自の書式設定が付いているものもあります。

ブロックを設定する
各ブロックには独自の設定があります。設定を確認するには、ブロックを選択します。そのブロックの上部にツールバーが表示されます。また、エディターの右側にあるサイドバーには詳細設定が表示されます。
ブロックの上にある設定には通常、整形オプションやブロックタイプを変更するオプションが含まれます (以下のスクリーンショットの [1])。
エディターのサイドバーで、現在のブロックの設定 (スクリーンショットの [2]) と、文書全体の設定 ([3]) を切り替えられます。
ドキュメント設定では、タグやカテゴリーを追加したり、アイキャッチ画像を選択したり、投稿ステータスを確認・変更したりできます。これらはページまたは投稿全体に適用されるオプションです。

エディターの右上にある歯車アイコンをクリックして、設定カラムを表示または非表示にすることができます ([4])。
ブロックタイプを変更したい場合も、問題ありません。各ブロックを別の類似または関連するブロックタイプに変換できます。たとえば、段落を見出しやリスト、または引用に変更できます。

ブロックを削除する
ブロックを削除するには、そのブロックを選択し、そのすぐ上にある3つの点をクリックします。設定の中にブロックを削除するオプションが表示されます。

ショートカット
すべてのショートカットの一覧は、「WordPress ハンドブック」を参照してください。
よくある質問 (FAQ)
WordPress エディターはいつから WordPress.org で利用できるようになりますか ?
すでに利用できます。旧エディターに戻ることを選択しない限り、新しいエディターがデフォルトエディターとして設定されます。
新しいエディターではフロントエンドで投稿やページを編集できますか ?
いいえ。このエディターは、現在の投稿およびページエディターに置き換わるものです。この表示がサイトのフロントエンドでサイト訪問者に表示されます。ただし、エディターのレイアウトやビジュアル表示は、サイトを公開する際に表示される内容とほぼ同じです。
既存のコンテンツはどのように表示されますか ?
現在のコンテンツは以前と同じように表示されます。既存の投稿やページを新しいエディターで編集すると、すべてのコンテンツはクラシックブロックに配置され、以前のクラシックエディターと同じ方法で処理されます。
エディターとサイトではコンテンツが同じように表示されないのはなぜですか ?
多くの場合、テーマによって異なるビジュアル要素が表示されるため、エディターとサイトのコンテンツには多少の差異が生じることがあります。テーマによっては、エディターでサイトのフロントとほぼ同じように表示できるスタイルがありますが、同じように表示できないスタイルもあります。たとえば、テーマにサイドバーが含まれている場合、サイドバーはエディターに表示されません。これがサイトのフロントに表示されると、コンテンツの幅に影響する可能性があるためです。
あるサイトで使用できる設定が、別のサイトで使用できないのはなぜですか ?
ブロックの設定 (「ワイド」や「全幅」) によっては、テーマ別にサポートする必要があります。同じブロックを別のサイトに使用することもできますが、これらのブロックに適用できる特定の設定は、アクティブなテーマに基づいて多少異なることがあります。
旧エディターはまだ使用できますか ?
旧エディターに切り替えるには、Classic Editor プラグインをサイトにインストールして有効化してください。
ショートコードはまだ使用できますか ?
はい。エディターにはショートコードブロックが付属しており、以前と同じようにショートコードに使用できます。今後、多くのショートコードは独自のブロックになる予定です。
このエディターはアクセシブルですか ?
私達の目標は WordPress エディターを以前のエディターと同等以上にアクセシブルにすることです。すべてのユーザーが使用できるようにしたいと考えています。WordPress アクセシビリティコーディング標準では、「WordPress でリリースされた新しいコードまたは更新されたコードはすべて、レベル AA の WCAG 2.0ガイドラインに準拠している必要があります」と記載されています。エディターも例外ではありません。
新しいエディターでは特定のテーマを使用する必要がありますか ?
いいえ。新しいブロックエディターではすべてのテーマを使用できます。ただし、一部のテーマでは特定のレイアウト機能 (「ワイド」や「全幅」のコンテンツなど) のみをサポートすることがあります。